Uninsulated Soffit
Top of Fiberglass Shower
Uninsulated Soffit
Halogen Potlight
Halogen Potlight
20140413_092231
20140413_092231
previous arrow
next arrow
Uninsulated Soffit
Halogen Potlight
20140413_092231
previous arrow
next arrow
Insulation = Comfort
Miss Claremont
Designer

Insulation doesn’t CREATE heat — it just slows the temperature change. So you feel comfortable. So HOW could they build this house in 1994 with parts of the attic BARE?

We can fix it. You need to design Insulation properly, and not just Pile it on; It’s not a band-aid fix. Remember our goal: Comfort end Efficiency!

No Insulation in the Soffits

Poor Insulation is a national problem. In many homes, the actual insulation is HALF what was promised. This house was Worse; with NO ACCESS to the attic, NO ONE ever checked. So I cut a hole into the attic… What did I find?

  • The maximum insulation was 3-1/2 inches of loose fiberglass
  • About 10% of the attic had ZERO insulation
  • 24 Pot lights were open (=leaking) to the outside air (not covered)
  • Soffits extending into the rooms were uninsulated ( Photo to left shows the uninsulated soffit area in the guest bathroom).
  • ALL electrical access holes and fixtures leaked lots of air.
Bottom line: The entire attic had an R-value no greater than a double-pane window. And it was full of leaks… so the house was drafty.
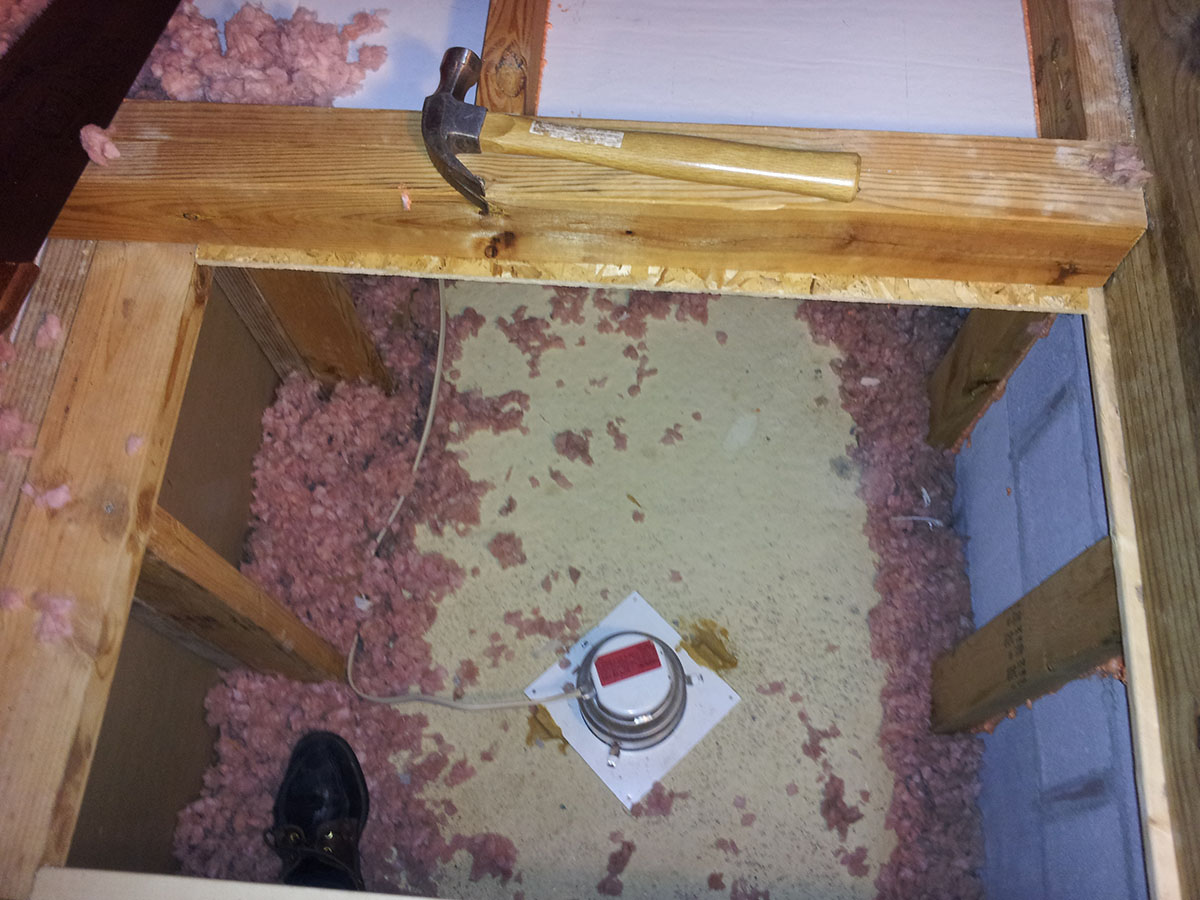
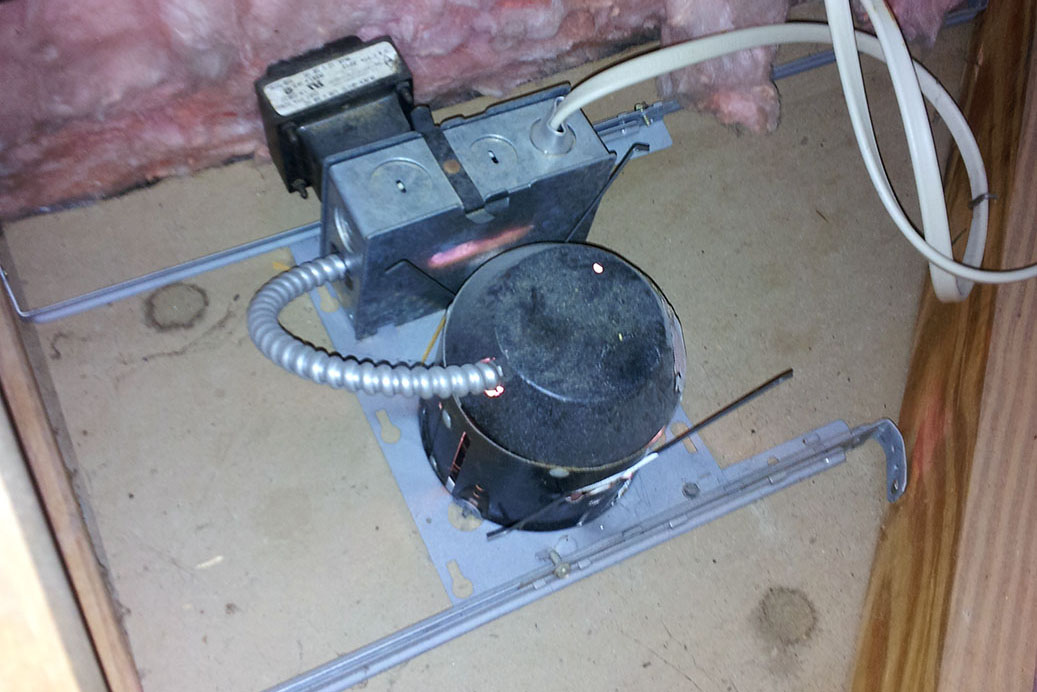
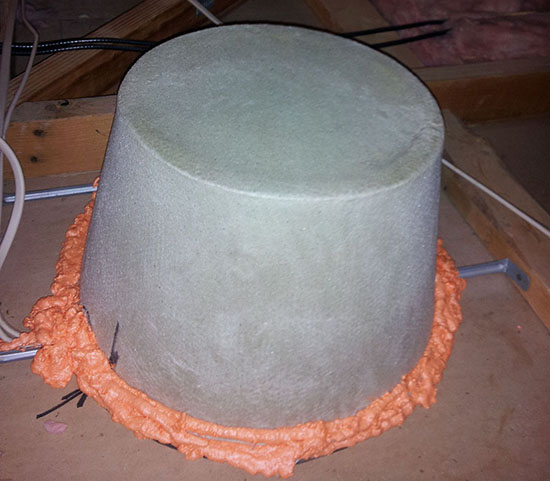
Here's another tip: If just 2% of a surface is uninsulated, the overall insulation R-value drops by 40%! So plug every hole. Air leaks = $$ out the window. We are a long way from making the house "too tight".
Miss Claremont
Designer

Let's fix it

I had heard — Before I moved in — that it cost over $1000 a month to heat this house. The heat pump alone had trouble raising the temperature much over 55 deg F in the winter. Insulation will change a LOT of that. A natural gas furnace will fix the rest (that is a separate project).

None of this is complicated. Anyone can do it. You just need attention to detail. Here’s the PLAN:

1 Build covers with insulated foam board to seal off all those open soffits. Use a Foam Gun to make the panels airtight.

2 Remove the loose fiberglass. (We’ll save it in big plastic bags for the last step). Then hunts for any holes and seal them off.

Likewise, seal all fixtures that are cut into the ceiling. Look for cracks along framing and ceiling. Stop air from leaking out of the heated space. building.

Remove the loose fiberglass blown-in insulation
Cover all ceiling light fixtures with fireproof enclosures

3 Cover the 24 pot light fixtures and the 6 speakers with air-tight, fire-proof enclosures. Foam these air-tight.

Then replace all the halogen and incandescent lamps with cooler LED lamps that cost 1/7th as much to run.

4 INSULATE. First layer is 3.5″ fiberglass with a vapor barrier. This comes up to the top of the wood in the trusses.

2nd Layer is 12″ UN-FACED fiberglass laid 90 deg to the first layer. This covers all the exposed wood below it.

First 2 layers of batt insulation

5 Remember all that loose insulation we raked up? Now spread it over the top making sure you fill any gaps in the insulation below.

We now have 3 layers of insulation plus a vapor barrier that was missing before. Plus we insulated the ENTIRE attic.

And… We Stopped ALL THE LEAKS.

The R-value? Figure 18″ of insulation @ R3.3/inch = R60. Not too shabby.

Prologue

We started with the attic because most heat is lost out the top of the house.

Attics done, we look to upgrade any walls. The photo to the right was the FINISHED wall in the upstairs closet. No drywall, just loosely positioned 4 pieces of insulation. Of course, the air just blew right past it so the insulation was completely wasted.

The photo to the far right shows the same room after :

  • Fiberglass insulation was replaced
  • Walls covered with 3/4″ insulation board
  • Then 5/8″ drywall and painted
So WHY did the homeowner accept the original “crap” job when it was built?
 
If it doesn’t look right to you, it probably isn’t!
Original High Quality Builder's Work
Finished repair of the Closet

Lastly: Do not overlook the smallest detail

  1. The one major theme: Insulate and Stop the Leaks. Insulation can do little good if the air just blows in past it. Every place where a pipe or wire penetrates an outside member, the space gets filled with insulating foam.
  2. All hot water pipes get wrapped in pipe insulation. Throughout the whole house if I can get to the pipes. 
  3. In the cellar or crawlspace, Insulate all rim joists, too. Consider using Rock Wool insulation; it holds its shape and is impervious to dampness. Since I turned the crawlspace into “Conditioned Space” (no longer open to the outside) I insulated the cellar walls with 2 layers of foam insulation board.
Horror Story

I had heard that a water leak that caused 10’s of thousands of dollars’ damage. So I went looking. 

Could NOT believe what I found! Running across the unheated attic, 4 feet in the air, dangled a tiny 1/8″ copper line! I could see that this line had BURST in the past and was now patched together.

Now you know water will freeze in the winter. Put water in an insulated chest and it freezes, too. Just takes a bit longer. Aha! So you  know more than the plumber who  wrapped fiberglass batt insulation around the copper tube.

However — without a source of heat — this copper line will just freeze once again.

All water pipes must run through HEATED, INSULATED SPACE. If you don’t heat your house in the winter, then ALL the pipes will freeze.

You hire and pay Professionals figuring they understand this.

I removed that copper line.